With the release of SXA 10 the tooling around creating an SXA theme took a leap forward and added new functionality that made the development and delivery of themes much better. No more fighting with the ASP.Net bundler to minify and concatenate your files, now we can pre-optimize the files before they get imported into Sitecore.
This gives us a number of advantages, but how do we deploy a theme now? Do we import it into a live site? What does the development workflow look like?
Well, there are a few options, but in this post, I’m going to talk about how we do it at Perficient.
Pre-Requisites
Just a few caveates for this method. At Perficient, we use Unicorn exclusively for item serialization. This method could work for Sitecore Content Serialization, _if_ Sitecore gets feature parity with Unicorn and adds things like Field level exclusions.
Also, we are using Azure DevOps pipelines for build and release, with some PowerShell commands and Git as our source control system. The principles for this method could be applied to other setups, but I will be focusing on our setup.
This solution also makes use of environment variables to denote whether the environment is for local dev or non-local dev.
Source Control Setup
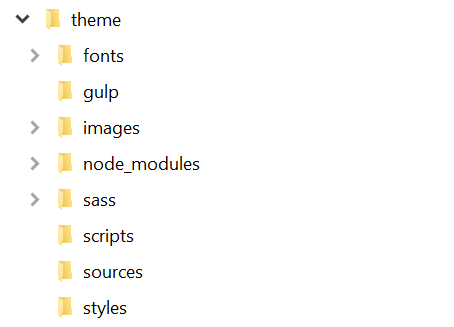
For the theme, there are 2 parts that we include in source control. First we have the static files, the SASS and JS files created by the SXA CLI. We make sure that any file that is generated by the CLI, e.g. all the CSS files, are excluded from source control. This helps prevent annoying merge conflicts and these files do not need source control anyway.
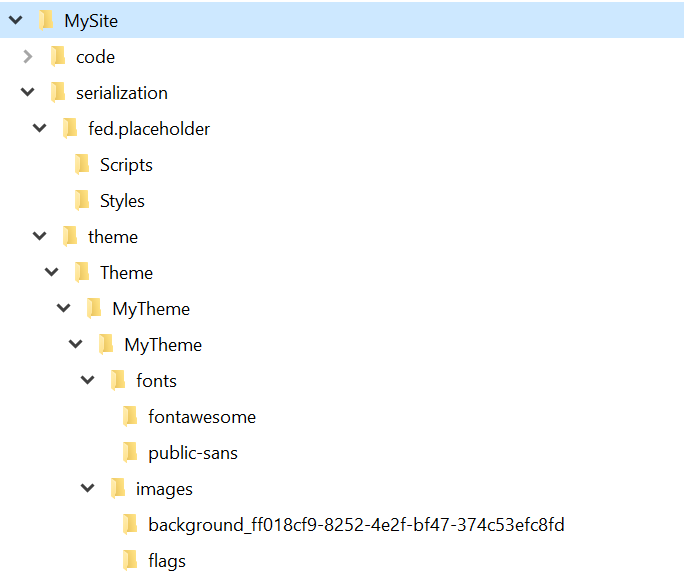
Secondly, we have the serialized Theme items. This includes all the items that are part of a theme, the fonts, images, CSS and JS items.
Unicorn Setup
The Unicorn setup is where this gets interesting, and a big thanks to Mark Cassidy for all the feature additions and maintenance he has done on Unicorn since taking it over from Kam, even with SCS - Unicorn is still the best option for item serialization.
We have 2 configurations for the theme. It may seem overkill, but the reasons will become apparent.
The first configuration, is a basic always deploy configuration for the main theme files.
1 | <configuration name="Project.MyTheme.Theme" |
Notice that we are excluding the pre-optimized-min files for both CSS and JS here.
The second configuration has the magic:
1 | <configuration name="Project.MyTheme.Theme.FED.Placeholders" |
The field filter is what helps us out here. We are serializing the pre-optimized-min JS and CSS files, but excluding the Blob and Size fields. Notice that those field filters have env:require="Local", this means that these fields will only be excluded for local development. When this is deployed to the upper environments - dev/qa/stage/production etc… these fields will be included in any sync tasks.
What this gives us locally is a way to serialize the theme and prepare it for deployment, without having to worry about merge conflicts caused by the base64 encoded blob data in the pre-optimized items being updated when the themes are updated during development.
You could do all this with a single theme serialization config, but everytime a developer imported the latest theme, it would update the values in source control and becuase the blob data is a base64 encoded string, it will cause merge conflicts a lot. To get around that, your developers could just ignore changes to that file, but that relies on developers having a good memory… and I would forget frequently! Having the field filter just makes the process seamless and means there isn’t anything extra for developers to do day to day.
The final piece…. Build and Deploy scripts
To tie this all together, we use the build and deploy scripts in the azure-pipelines.yml file. First we need to make sure the theme is built using the SXA CLI. We could use the NPM tasks in in the azure pipelines, but its easier to just use a PowerShell script to do it:
1 | - task: PowerShell@2 |
This is the task, notice that we can use this to build multiple themes if we are a multi-site implementation. Just pass in the path to the static theme files for each sites theme you want to build.
Once we have built the theme into the pre-optimized-min CSS and JS files, we can use those files to populate the Blob and Size fields in the serialized scripts\pre-optimized-min.yml and styles\pre-optimized-min.yml. This effectively gives us a complete serialized file ready to be sync’d as part of the deployment process. This script assumes that your theme and theme serialization folders are at the same level.
1 | param ( |
And now for the magic…. your deployment process doesn’t change. Assuming you already have release steps in place to sync Unicorn when you deploy your CM instance, this will automatically deploy your CSS and JS pre-optimized theme, nothing else to do!
Conclusion
This process may initially seem a bit daunting, but when you look at the implementation, its actually pretty simple and once it is setup it doesn’t take any effort to maintain. Its easy to apply to multiple projects and makes deploying the theme to QA/Stage and Production sites a breeze.
A big thanks to Ben Lipson for working out some of the implementation details around the Field filters.
- Richard

